Sunday, March 28, 2010

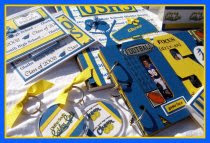
A New Inspiration Journal...

I used to use journals like this on a regular basis, but somehow I went from creative and fun journals I had made to a boring ole school spiral! How inspirational can a boring school spiral note pad be? Not very... so I made a new Inspiration Journal and transferred my information that I had in the spiral over to it.

I love having one special place to keep ideas all together in, so I don't have to reply on my memory! If I see or think of things that I want to do or learn how to do I keep them listed in my Inspiration Journal.

I love using quotes on my layouts and in projects, because sometimes I just don't have any or very much personal journaling to do and there are so many meaningful quotes out there that just seem to work a lot of the time, so those go in here as well.


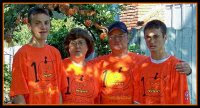
For the front cover, this time I used old photos of my hubby and myself (Note: his are older than mine! HA!) It seems I am ALWAYS scrapping the boys and doing different things with their photos, so this was kind-of a fun change.

In the notes section... that can be ANYTHING, from sketches that I might do while watching TV or while dinner is cooking, to notes about color combo's I've seen, liked and want to work with at some point as well as notes about specific tools, products or papers that I want to use for particular projects.

I always designate a few pages for jotting down different scrapbooking, crafting or sewing websites that I want to remember and have handy, be it for ideas, patterns, tutorials and inspiration to supply ordering info. and log-in information. It's just nice to have all of these things in one spot. I have a few favorite Blogs listed here and a few phone numbers and contact names as well.


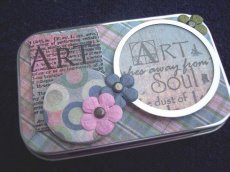
When designing the front cover I made a little spot for a tag to slide in and out of. I covered both his photo and this tag that has my photo on it with a page protector that I cut to size.

Inside the front cover I have a quote that I absolutely love! This quote was on the front of a greeting card I have had for years and years and even though it doesn't actually coordinate with the colors and papers I was using here I left it as it was.


In the "To Do" section I have my "Craft Bucket List" of things I want to do or learn how to do! I spent the other night transferring all of these things over from the spiral while watching "Housewives" on BRAVO. HA! I added a bunch of my little "Melanie Doodles" through out the list, just 'cuz I'm goofy like that!

And there you have it, my new and improved Inspiration Journal! A lot more inspiring than the old spiral note pad!


Materials used:
K & Company Blank Hard-cover Spiral Journal
Daisy D's Papers
Tag Maker & Tape
A few K & Company stickers and embellishments
Buttons & thread
Tab Maker Punch

Saturday, March 27, 2010

This boy...

It's been a while since I updated, so I have a mish-mosh of things to share. I've been scrappy and will share some pics of a another little Inspiration Journal I just finished making and am now just started to use soon. I still need to take pictures.

We've just finished celebrating a BIG birthday recently, which resulted in a VERY BIG surprise for Granny! (my mom)

The Birthday... THIS BEAUTIFUL BABY BOY...


who later was an absolutely adorable little guy...


And one of his Mommy's two favorite guys to take photos of...


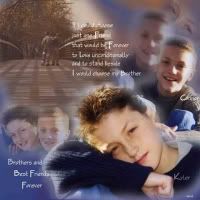
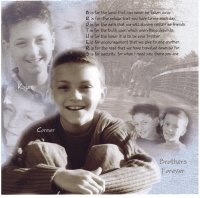
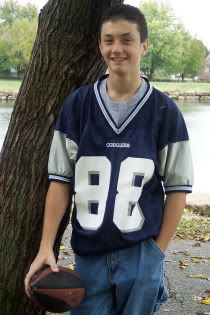
who seemed to grow up right before our very eyes, much faster than I could have ever expected and has been an absolute JOY to raise, never giving us a bit of trouble and soon looked like this...


And started doing things like this...


and this...


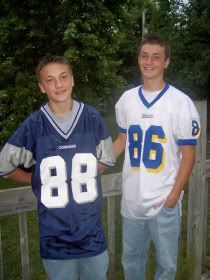
who will be Graduating soon and now looks like this...


Well, that beautiful little baby boy, who was an adorable little kid, who was soooo much fun to raise and made us proud nearly every day of his life just turned 18 years old this month. When this kid makes up his mind about something, he seldom changes it. He decided over a year ago exactly what he was going to do on the day of his 18th Birthday and after planning and working on his design for well over a year... he did it!.


He got a tattoo! Not just any tattoo though! (If it were his dad and I may not have been nearly as agreeable!) He decided over a year ago that he wanted to honor his Granny with the tattoo he was going to get. He designed (and re-designed and re-designed!) a cross with a Pink Breast Cancer Awareness Ribbon that has a tiny little heart on it, and is wrapped around the cross with the name of his Granny, "Judi" who is a Breast Cancer Survivor above the cross.

Each element of the tattoo design he came up with has a special meaning to him. His design represents his own belief & faith in God, as well as the love he has for his Granny and his support for Breast Cancer Awareness. She is an amazing woman. She's not one to ever complain about anything from minor aches and pains to big ones! She uses her faith, strength and humor to get through even the most difficult curve-balls that life tosses her way. She has been such a role model for all of us in so many ways... and over the past 18th years he's certainly picked up on them! He's very proud of her. (And she couldn't be any more proud of him!)


The Pink ribbon appears much darker or redder if you will, than it actually is because this photo was taken just a few hours after it was done. Over the next few days it became prettier and prettier once you could see the shading that was done on the ribbon with several shades of pink and white.


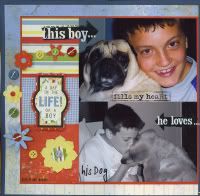
Well, all of this gave me a reason to do something that I could have never predicted some 18 years earlier that I would ever be doing...


Another thing that I wouldn't have predicted is how stinkin' proud of him I would actually be while I was doing it!!

Saturday, February 20, 2010

Still playing with felt!

I found myself with more than 4 hours last night to do absolutely any crafty little thing I wanted to do, as long as I could run home, grab what ever I needed to use and get out the door again in about 30 minutes. So I quickly packed a small tote with all of the supplies and goodies I had been using recently to make my little heart~felt pins and I also quickly cut some pink felt using the Sizzix Breast Cancer Awareness Die, (a Christmas gift!) running it through my BIG SHOT machine(also a Christmas gift!).

My plan as spur of the minute as it was, was to see what I could come up with using the same basic idea & techniques that I had been using to make my heart~felt pins, but with an awareness ribbon shape, in pink to represent Breast Cancer Awareness rather than hearts. I'm actually very pleased with how they turned out!

After stitching two felt ribbon pieces together with a thin layer of quilt batting sandwiched between the two, I sewed a little safety pin to the back of each.

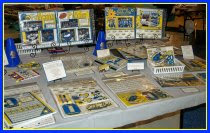
Ok, I admit, there really was no reason for the last photo above, other than it's just a little gathering of things I've made in the past week or two and I love taking photos! Besides, it really is all about the presentation, right?! ;o)

Thursday, February 11, 2010

Valentine Candy...


Eye candy that is! ;o)


Gifts...


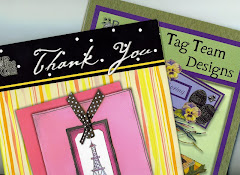
Some Valentine cards and a Valentine Gift card Holder...


Friday, February 5, 2010

My day off...


I had the day off from work today and THIS is what I did!

When I woke up we had a lot of beautiful brand new white snow on the ground and it was still falling from the sky! It was so pretty! We've gotten a lot of snow this year, but I am still not tired of it! I love it...especially when I don't have to go anywhere! That's the best!

These are little Valentine felt pins. I got it in my head just last night that I was going to make these. I made 2 before going to bed and more (not all shown) today. I had no idea at first, if these would turn out as cute in real life as they were in my head last night, so I had to start on them right away to find out!

The coolest part...I'm using my Big Shot machine to cut the hearts out of felt. Loving this! It's SO EASY and a perfect cut every time! Then I am sewing buttons, beads - and other little goodies on the front heart before placing it over the back heart to sew the two together. Just before I finish sewing them I'm stuffing them with polyfill, then I finish stitching them close before sewing a small safety pin to the back. It doesn't sound at all difficult and it's not...but they sure take me a long time to do! Long enough that I am not even going to confess how long one takes me! I'm loving it though, very relaxing!